
Company Administration Guide
Company Administrators have additional options including security settings, company limits and user management. Administrators can add users or other Administrators.
Within the Company Settings pages you can tweak various settings that apply to all of your users, or just selectively. You are also able to set API and STOP settings.
User Management
Under User Management you can see a list of user logins configured company wide. It includes useful information such as when the last message was sent by that user (helpful for finding inactive Users), last login and the individual's role. You can search for users using the convenient instant search box.
Bulk activities are possible on the User Management screen, for example you can select multiple users and bulk apply roles, resend the welcome email, or deactivate them.
The available menu options are:
Enable Shared Messages
Shared messages have been made an option in user management page. If switched on, a user will be able to view messages sent and received by other users in the same company. With shared messages enabled, both from and to columns will be visible in inbox, sent and all messages list. Clicking a message of someone other than login user will navigate the conversation page of the message. Conversation page should show both from and to for each message. Users are allowed to reply to MOs of other users in conversation page.
Email2SMS settings
User-specific Email2SMS settings can also be defined.
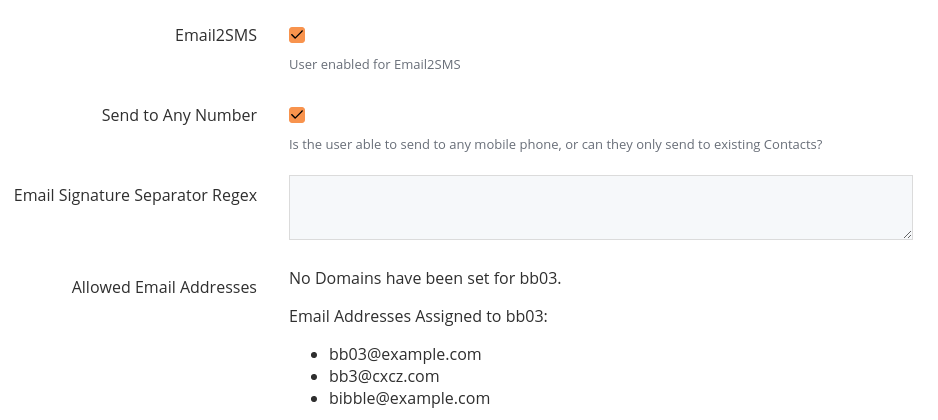
Send to Any Number
Although the service supports sending 'email' to phone numbers, your administrator may have configured the system to only allow messages to be sent to known Contacts. When 'Send to Any Number' is enabled the user may send to any number.
e.g. 6427000001@etxtservice.co.nz
Email Signature Separator Regex
Due to SMS character/part restrictions it is useful to have Email2SMS messages automatically exclude your email auto-signature content from sent SMS messages.
To do this eTXT uses an Email Signature Separator Regex to identify the start of your Email auto-signature. Any content that appears in the email after the Regex characters will automatically be removed and not included on your Email2SMS messages.
The default characters that appear in this field are two dashes and a space “-- “, (this will also take effect if this field is left blank) but this field can be set as any characters you chose. For example, using “Regards,” might be useful if your emails always end with this closing.
All email2SMS content sent from your email will now only include the content that appears before your Regex characters.
Allowed Email Addresses
The email addresses or domains that will be billed to this user are listed here. Management of this information is handled in the purpose-built Email2SMS page.
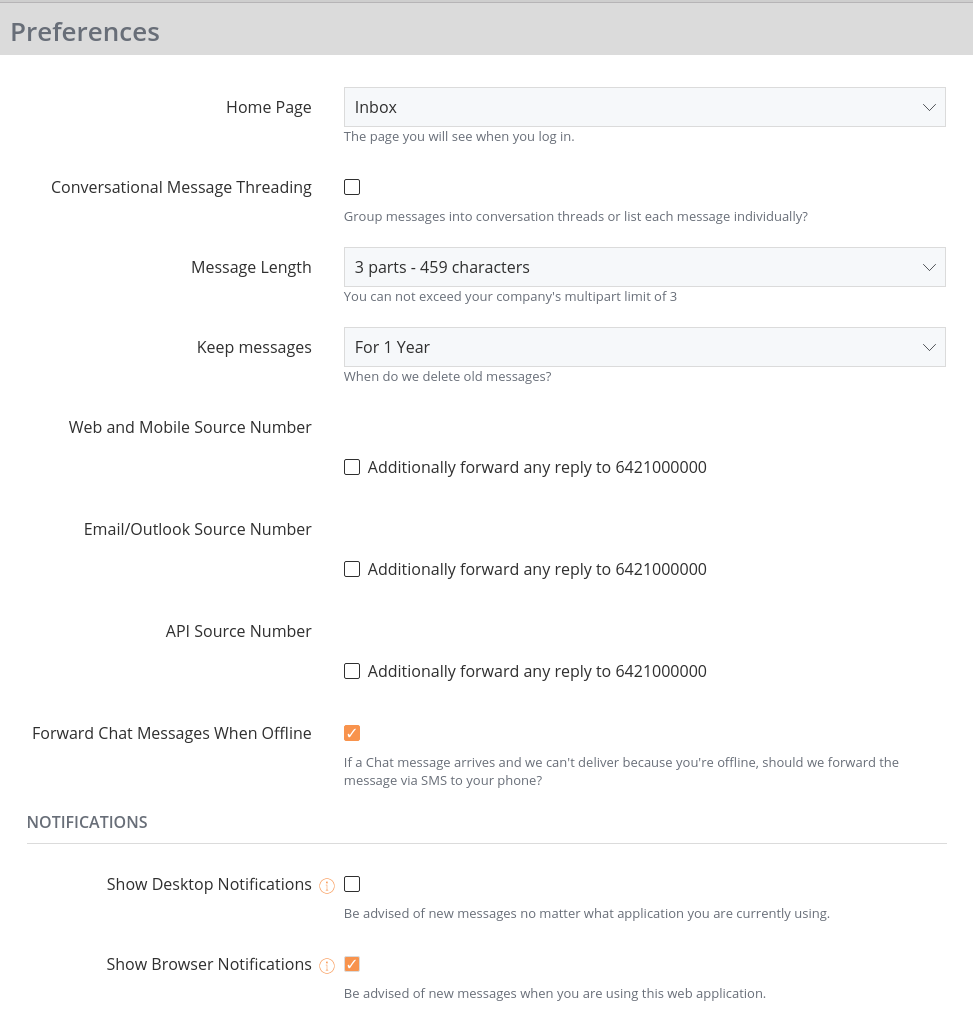
Preferences
A User can control some of their preferred behaviour, such as the 'Home' Page they see when they log in, on the Preferences page.
Company Settings
Company Limits
Message Limits
The Administrator may set some messaging limits for the company. These limits apply across all users within the company. For example, with three users and a message limit of 500 then when the combined total for all three users reaches 500 no further messages may be sent.
Only SMS messages are included in any message limits.
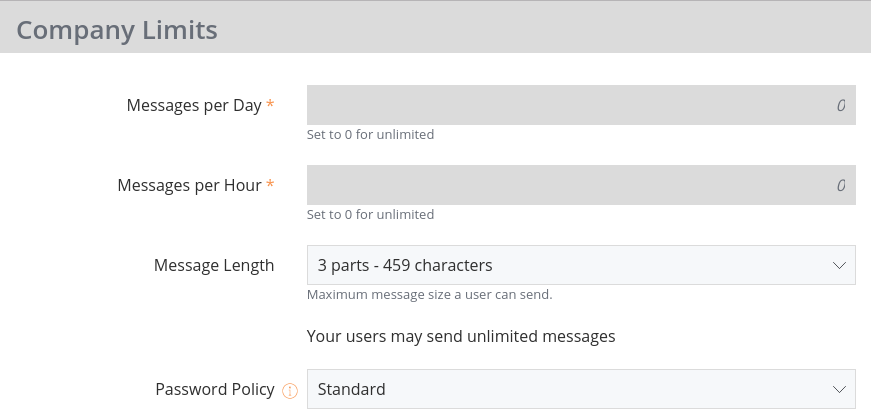
Password Policy
Password Policies let you set the password strength for users within your Company. This allows for added security and reduces the possibility that your Users will be compromised.
Default Consistent Numbering
You may notice when you first start sending out messages that the numbers the message sends from change. Turning on Default Consistent Numbering means that every time you send a message, the recipient will always receive the message from the same number. As long as you send a message to someone every 6 months, that number will be locked in.
Note: if you have different users messaging the same people, then there is the chance that if two separate messages get sent to the same person in a short space of time, the recipient can only reply to the most recent message. With Consistent Numbering off, these message threads will be kepy separate. You’ll need to consider if this is a situation that may occur before deciding to turn on Consistent Numbering.
Contact Settings
Contact Settings let you define behaviour associated with your Contacts.
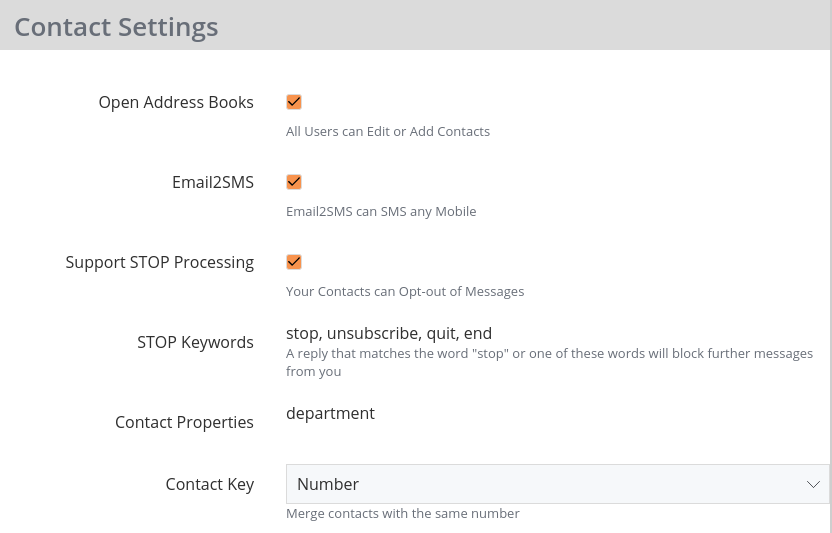
STOP Keywords
When you are sending messages to the general public in many regions (eg: the United States, United Kingdom, Australia, New Zealand, Ireland) you must provide a mechanism for the recipients to be able to stop receiving these messages.
With this setting enabled you can setup an automatic trigger on specific words such as STOP (or any words you define) being received and these numbers are automatically added to your company shared blocklist automatically. Block lists apply to ALL your Company users, blocks are applied at a Company level and not a user level.
Please note these are case insensitive and whole words only, so for example ‘stopping’ would not trigger an opt out if STOP was the keyword but ‘stop’ would.
Contact Properties
Contact Properties represent custom properties (eg: 'department', or 'favourite team', or 'pet name' that your Organisation wishes to be able to define for their Contacts. When Contacts are created, these fields can be edited.
Contact Key
This defines the identifier used when Contacts are imported. For more information see the import documentation.
Mobile Settings
Mobile Settings control how your users can use their own mobile phone number.
Forward to Mobile Number
Forward to mobile is a feature that enables you to relay traffic to and from your personal mobile. Useful, for example, when out of the office. You'll be charged a standard text message for using Forward to Mobile.
API Settings
API Settings provide the opportunity to configure the eTXT API. Primarily these settings control how we call your servers when new messages or statuses arrive into our system.
Callback URL Format
Callbacks from the eTXT API can be either in XML or the HTTP FORM format. Changing this setting modifies the return payload for all callbacks sent to the Callback URL, so make sure your server supports the selected format.
Default Callback URL for Replies
You can specify the Callback URL for replies within each individual API call and this works well for messages that come in as replies to outbound messages, however it does not function when you have your own virtual number or short code. Setting this value to an http or https endpoint is supported, and you can also specify an email address using the mailto format.
Default Callback URL for Statuses
You can specify the Callback URL for Status messages within each individual API call and this works well for messages that come in as replies to outbound messages, however it does not function when you have your own virtual number or shortcode. Setting this value to an http or https endpoint is supported, but mailto: is not supported for status callbacks.
More Information
For more detailed information please see our comprehensive eTXT API documentation.
Email2SMS Security
Email2SMS Security allows Administrators to control the use of the Email2SMS functionality. Access is restricted based on the source of the email. ie:
Emails from a given source are then assigned to a eTXT user, which is in turn used as the sender of the forwarded SMS message.
Example: Allow all email users at the @example.com domain access to use Email2SMS. Messages are sent via a single eTXT user.
This is the most commonly requested type of licence.
- Login as an Administrator
- Visit the Email2SMS page under 'Company Settings' (click here)
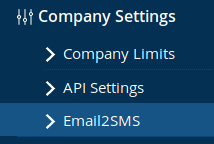
- Click 'Create Email2SMS Security', and define:
- 'Emails Sent From' as 'Domains'
- 'Security Type' to match your preference
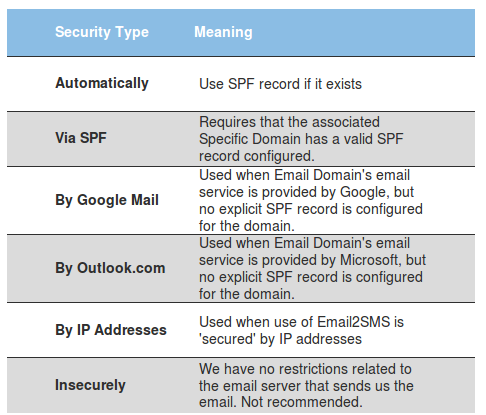
If you use Google for your email, you should choose 'By Google Mail'. If you use Office365 or Outlook.com for your email, you should choose 'By Outlook.com'. If you have your own mail server with a well defined IP address you could use "By IP Addresses", but we strongly recommend 'Via SPF', which we describe in more detail here.
- Click 'Create Domain', and enter the name of your domain. eg: example.com. Click 'Save'.
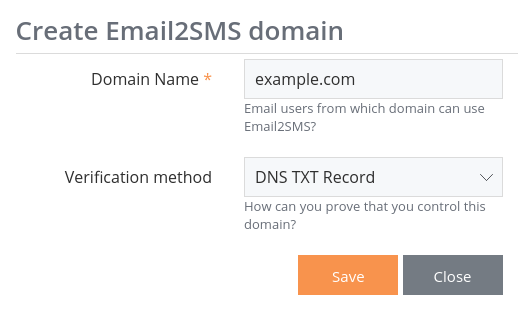
- Note the verification token provided. It will be something like 9e9e65dc2aeceb9bf16694b201961269.
- Within your Email Provider's Administration Interface create a TXT record containing the value shown when you clicked 'Save'. (More details below in 'How to verify a domain via DNS').
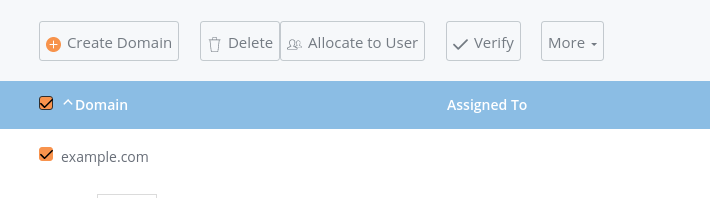
Now that we have defined the email domain, and proved that we control it, select the new domain and choose the 'Allocate to User' menu option, and select the eTXT user that emails from the domain will be sent via.
Example: Allow specific email addresses to use Email2SMS
- Configure 'Emails Sent From' to 'Email Addresses'
- Set the 'Security Type' appropriately for the email system sending the message. We strongly recommend 'Via SPF'.
- Click 'Create Email' and select an email address to allow, and the eTXT user to be used for SMS delivery.
How to verify a domain via DNS
When allowing access via domain, once you have added a domain for use in sending you will need to verify it through a TXT record. This is done as follows:
- Log in to your domain provider's administration interface.
- Open the DNS settings page.
- Locate the domain settings for the domain you entered (e.g. example.com)
- Set the TXT records value to the value given when adding your domain
- Optional: Change the TTL of your DNS record. This will allow updates to be propagated faster.
Why should I verify domain ownership?
Verifying control of the email domain is a way to ensure only your organisation can use your domain for email2sms.
To assist you, each time a new server (IP address) is used an email is sent to the Company Admin (only one email is sent per IP address). The address and the sender details are also logged and displayed in the Log section of the security page.
If you have any questions about IP addresses, mail servers or how to prevent email 'spoofing' and other fraudulent activities, contact your IT helpdesk.
The Forwarding User
When configuring Email2SMS Security, whether at the Domain level, or at the individual email address level, you need to ensure that at least one eTXT login is assigned as the ‘Forwarding User’. This user is used to send the SMS message on behalf of the email user.
You can have multiple email addresses configured, and all of them can share the same ‘Forwarding User’.
Importing Emails
Using the import function allows you to export a list of email addresses from your existing systems and import them straight into eTXT for use for sending SMS via Email. There's a handy preview screen which allows you to view the emails you are importing to use for Email2SMS, then you can correct any issues you may have before attempting the import.
Sending a notification is an easy way to let all users know that their emails have been authorized for sending SMS via Email, with all email addresses being active and ready to instantly.
Imports should be done using a CSV in the following format
Email,Username
james.smith@example.com,james.smith
jason.jones@example.com,jason.jones
mike.jones@example.com,mike.jones
bob.day@example.com,bob.day
jane.smith@example.com,jane.smith
Blocked Numbers
Blocked Numbers provides the facility for a Company Administrator to block selected numbers for all of their users quickly and conveniently.

An Administrator may also add numbers to a specific user's blocklist. The user is unable to edit or delete these entries. The user must be selected from the dropdown which then provides access to the per-user blocklist.
Users can continue to operate their own personal blocklists regardless.
The default behaviour of blocked numbers is to prevent users from sending messages to blocked numbers. Block Inbound Messages setting in Company Limits allows users to block incoming messages. Blocked messages will not notify users and will not appear in the inbox.
